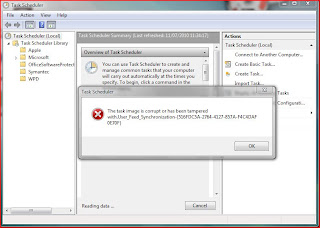
then rerun the Task Scheduler to confirm that the error is gone, then import a non-corrupted version of the task back into the Task Scheduler.
Most of the work you have to do is to locate the task file in question.
The task files are located in C:\Windows\System32\Tasks.
If you try to open the task folder, you might get a UAC prompt asking you for permission to access the folder, this is OK, just click continue to access the folder.
In my case, the corrupt task was "Microsoft-Windows-DiskDiagnosticDataCollector".
 This was a Microsoft task, therefore I had to go into the C:\Windows\System32\Tasks\Microsoft\Windows\DiskDiagnostic folder to locate the actual task xml file,
which was named "Microsoft-Windows-DiskDiagnosticDataCollector".
Once you have located the task file, close the task scheduler, back up the corrupted task file to any location of your choice, then delete it, then open the task scheduler to confirm that the error has gone.
What you now need to do is to export the non-corrupted task from another computer or virtual machine, and import it into the task scheduler.
To export the task in question from another computer, follow these steps.
1. Open the Task Scheduler, then drill down into the task in question, then right-click on the task and select "Export...".
2. Save the exported XML file to a location of your choosing, then copy it over to the affected computer.
3. Once you are back on the affected computer, make sure that the task scheduler is closed, then you need to run the task scheduler as an Administrator.
4. To run the task scheduler as an Administrator, click Start>All Programs>Accessories>System Tools, then locate "Task Scheduler", right-click it and select "Run as Administrator".
5. Once the task scheduler is open, drill down to the folder where the task is supposed to be located, right-click on a blank portion of the window, and select "Import Task...".
6. Once you have imported the task, a "Create task" window will open as shown below, just click OK to it.
7. The task should then be successfully imported, you can then close the task scheduler, and the problem should be fully resolved.


 Posted in:


0 komentar:
Post a Comment